
All of these pictures are copyright © 1980-1999 Stephen M. Dunn. You may view these pictures for your own personal enjoyment, and you may print one copy of each for your own personal enjoyment. You may not redistribute, edit, or sell these pictures, or use them in any manner other than as permitted above, without prior consent from me.
Pointing a camera at something and pressing the shutter release button is easy. Getting a good picture, however, is not always so easy. This brief collection of tips is intended to show a few techniques and pitfalls. I've included some of my own pictures which illustrate the points. Some of these pictures are not really great pictures, but they show what I'm talking about.
These tips are more technical than artistic. Also, this isn't anywhere near a complete list of techniques that might be useful. If you're interested in photography, I strongly urge you to read books and magazines, and consider taking courses. Many schools, colleges, and universities offer photography courses ranging from introductions for casual users through full-fledged degrees.
There are lots of photography resources on the Net. One that I find particularly useful is photo.net, where you'll find pictures, equipment reviews, tutorials, and discussion databases.
If you're taking a picture of something, you have to decide how much of the frame your subject should fill. Sometimes you want to show the subject and its surroundings; other times you want to show the subject and nothing else.
|
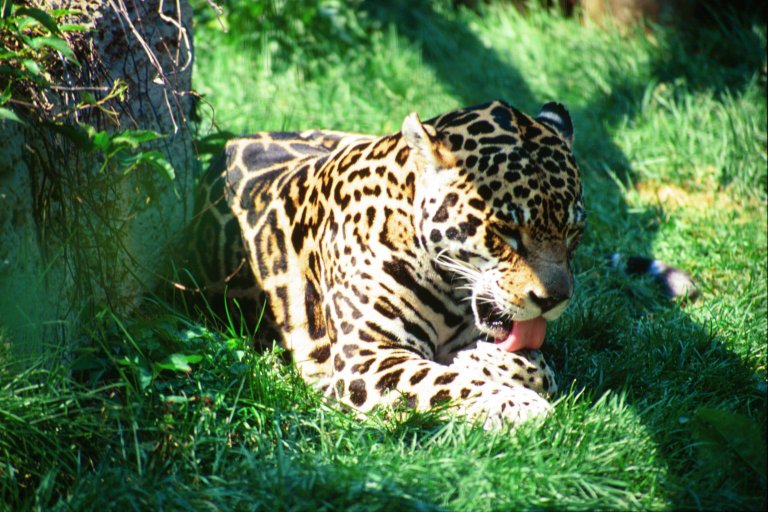
| The subject of this picture is the jaguar. The surroundings really aren't important. A tight composition makes it perfectly clear what the subject is. Also, given that film and photographic equipment have their limits, you tend to see more detail. In the case of a prowling jaguar, there's also a sense of tension - the cat is right in your face and may be ready to pounce! |
Many people use flash if it's dark, and don't use flash if it's light. However, there are times when flash is useful even in well-lit situations. One use is to reduce the contrast in a scene. The human eye can easily handle a scene with a wide range of contrast. Film, on the other hand, can't. If you take a picture of a scene with a wide contrast range, you'll find that shadows and highlights turn to featureless black and white, respectively, even though your eye sees detail in both. Flash can help reduce the contrast in the scene so that your film can capture more detail. It can also help get rid of distracting shadows.
| No fill flash | Fill flash | |
|---|---|---|
|
|
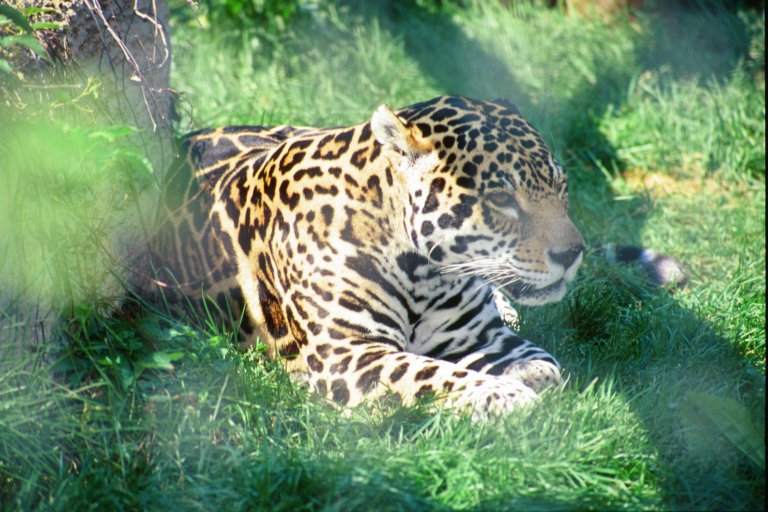
The first picture was taken without flash. Note now prominent the shadows across the jaguar's face and body are. The shadows distract the viewer's eye from the subject and reduce the level of detail visible. The second picture uses fill flash to reduce the shadows, yielding a much more pleasing picture. One unfortunate consequence of shooting pictures in zoos is that there are often cages in the way (go figure!). Fill flash sometimes makes the cage bars more prominent in the picture. In the first picture, you really can't see them. In the second, you can see a grid of slightly lighter patches running horizontally and vertically; that's the cage reflecting flash back at the camera. If you can get the camera right up against the enclosure, you can get rid of these, but usually there's a fence preventing humans from getting right up to the edge of the cage so that people don't do silly things like sticking their hands into the jaguar's cage to try to pet it, so if you want to use fill flash, you have to put up with the cage reflecting it back at you.
|
Fill flash can also bring out detail in pictures.
| No fill flash | Fill flash | |
|---|---|---|
|
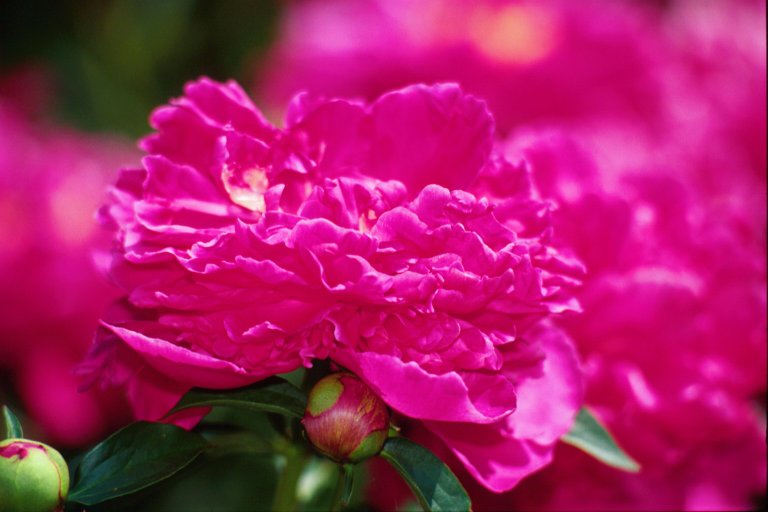
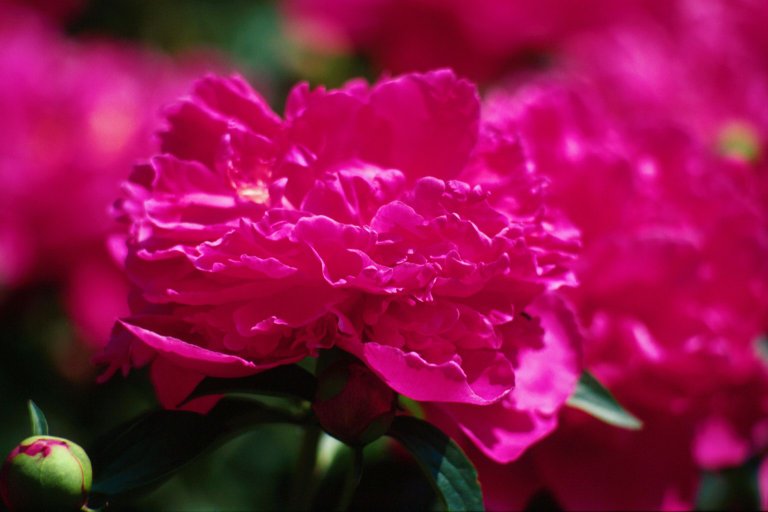
| The first picture was taken without flash. It's pretty enough. But the second picture's colours are a little bit more lively. You can also see the stem, which was in shadow in the first picture. |
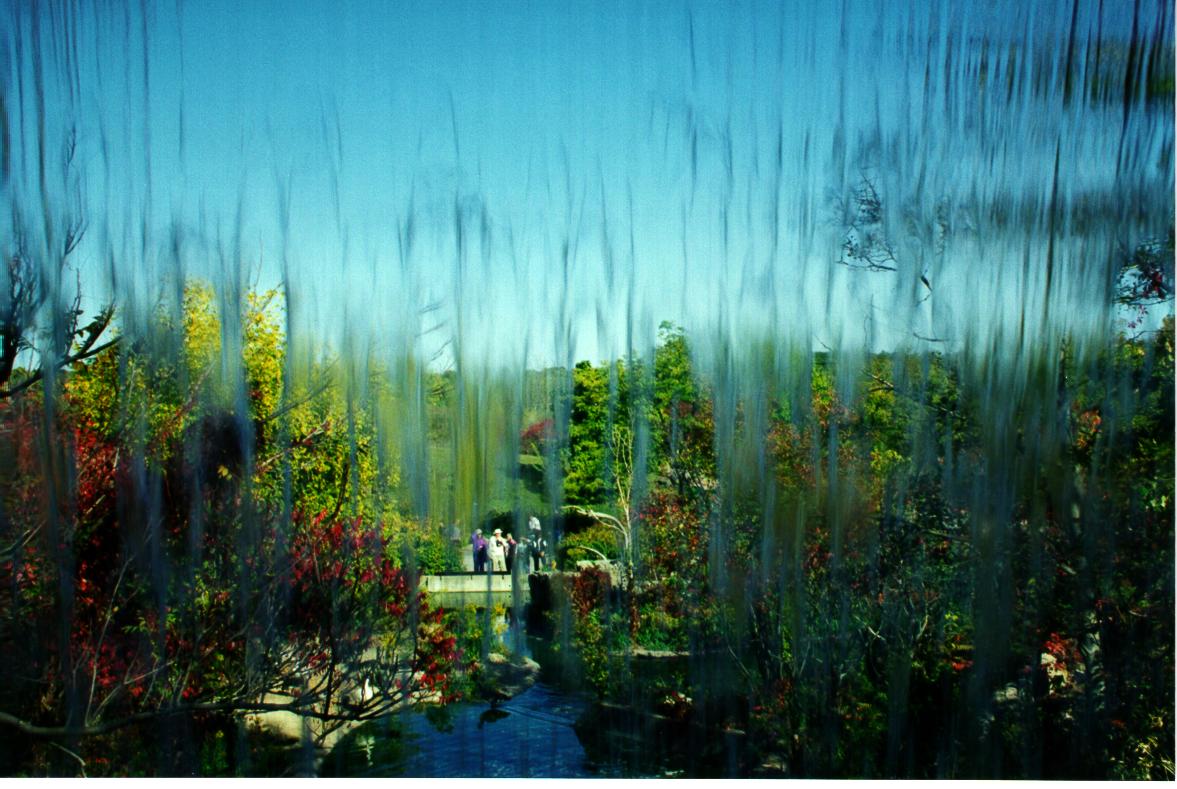
Unless you're certain that a picture would look better with the horizon on a funny angle, keep it level. The same applies to anything that you would normally expect to be horizontal or vertical; if it's at an odd angle, the picture will generally not be pleasing.
|
| This picture just doesn't feel right because the bridge and the surface of the water below it, which should be horizontal, are not. |
The human eye doesn't have a choice of shutter speeds. Many cameras, however, do, and you can take two pictures of the same subject, at different shutter speeds, and get different results.
Here are some guides for a few types of pictures:
| This picture was taken at a relatively slow shutter speed (probably around 1/30); the falling water has turned into a blur. |

| This picture was taken at a much faster shutter speed (perhaps 1/500 or faster). The picture shows the water in a way the human eye can't. What we normally perceive as a sheet of water actually isn't. |
Flash is a wonderful tool, but it has its limitations. One of these is that the intensity of light from a flash falls off as the square of the distance from the flash. That means that if a subject that's 3m away has correctly illumination, a subject that's 1.5m away has four times too much light on it, and a subject 6m away has only a quarter of the light it needs. This means that flash isn't very good at illuminating scenes that have a lot of depth.
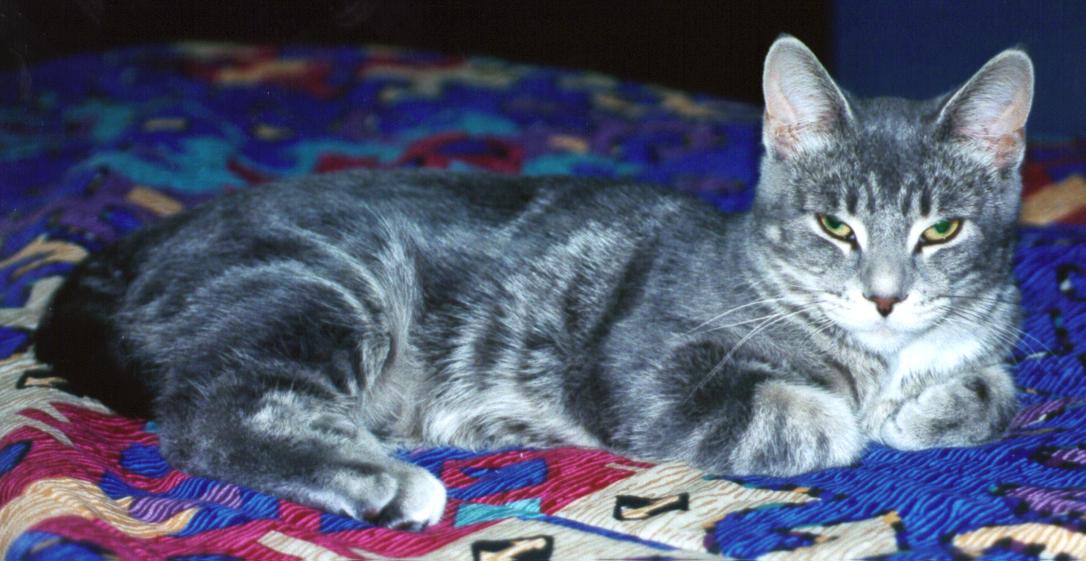
| Toby received reasonably constant illumination, as the farthest part of his body is not much farther from the flash than the nearest part of his body is. But look at the comforter. In front of Toby, it's quite bright. Not far behind him, it's rather dark. |
Your retina (the area at the back of your eyeball where images are formed) is red. Normally, you can't see this, because it's not all that well illuminated; if it's bright, the pupil contracts and not much light gets in and out, and if it's dark, there's not enough light to see the retina. However, if you use flash to take a picture of someone in the dark, their eyes may turn red, because their pupils are wide open (due to the poor light), and the light from the flash reflects off the retina and back out. The same thing happens with animals, although their eyes often glow different colours.
To reduce redeye, consider the following:
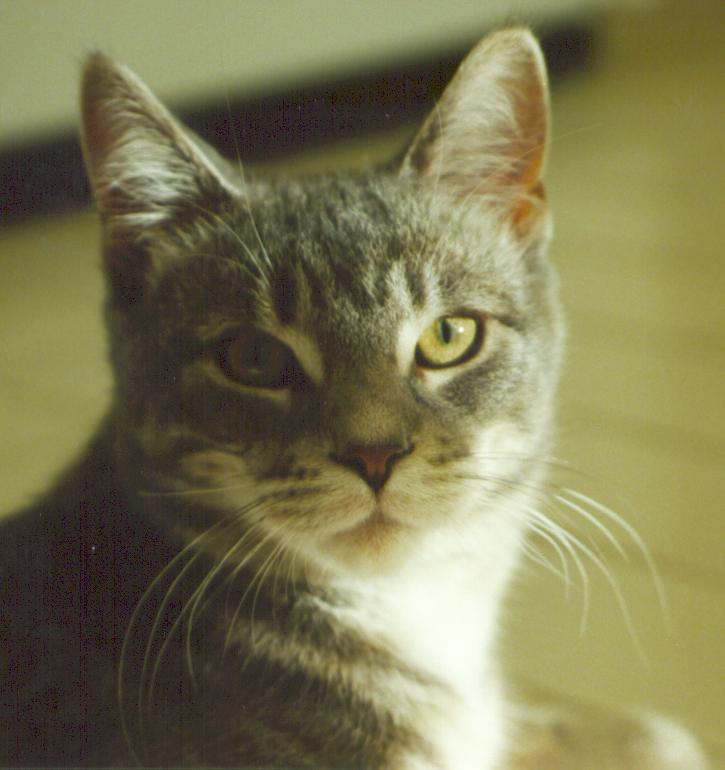
| Cats' eyes are among the worst for this, since they're highly reflective. The colour of the cat's retina can sometimes appear on the fur surrounding the eye, because the light reflecting from the retina partially illuminates the fur. |
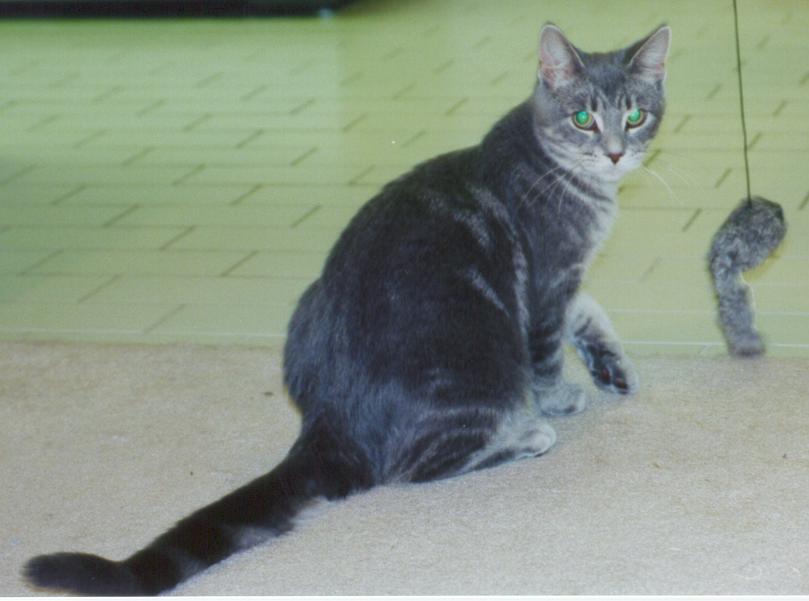
Have you ever noticed that different types of lights put out different colours? We notice these things, but we perceive them to be subtle, and we rapidly adjust so that we no longer see the odd colours. Film, however, not only lacks the ability to adjust, but also tends to enhance the colour. If you are shooting slide film, you'll need to use filters to compensate during exposure. If you shoot print film, you may be OK; the lab may be able to compensate during printing. However, if you have multiple light sources in the same image, you'll have problems; some parts of the image will have one colour, and some another. There are sometimes things you can do about this (for example, if you're using flash, you can put a filter on the flash to make it a similar colour to the other light source), but if possible, try to avoid these situations.
|
| Fluorescent lighting is among the worst offenders. There are numerous types of fluorescents, and each has a slightly different colour. But they generally turn out a sickly greenish colour when photographed. Note now the carpet in the foreground changes tone from beige at the very front (illuminated partly by sunlight and partly by flash) to green near the tiles (illuminated mostly by fluorescent light). |
| Incandescent light is yellow. This can sometimes add a nice warm colour to skin. |
| Look carefully at the building. It's supposed to be white, but it's actually slightly blue. Why? It's in shadow, and being lit by the sky rather than by the sun. Since the sky is blue, shadow areas tend to take on a blue colour. A skylight filter could have fixed this; skylight filters are slightly pink, to compensate for the blue tone of skylight. |
The world is three-dimensional; it has real depth. A photograph is two-dimentional; it's flat. Some scenes require a feeling of depth in order to be successful. Here are a few techniques which may help:
| Have lines leading from the foreground to the background - these lines will converge towards the horizon. Since this is the way lines work in the real world, we automatically perceive depth. |
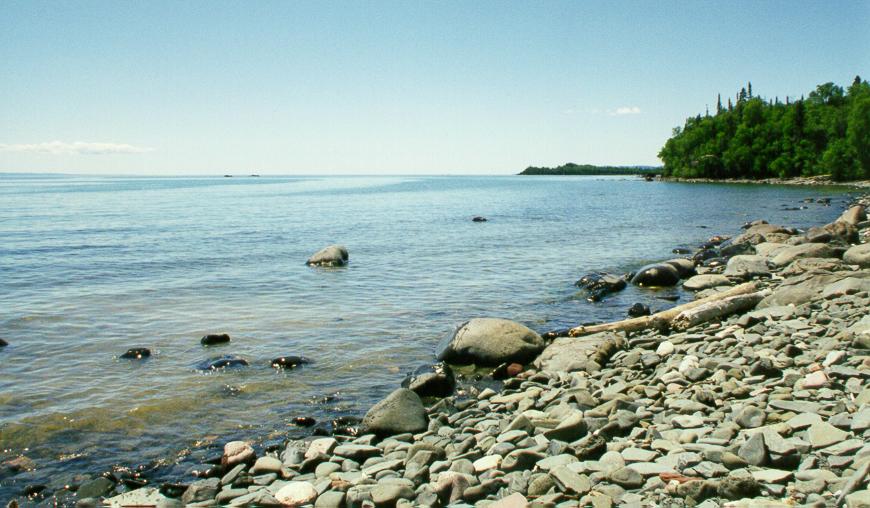
| Place objects in the foreground and in the background - this gives us a point of reference. The pebbles in the foreground look quite large. The pebbles a bit farther back look smaller. The trees are narrower than the pebbles. Since we all know that trees are much bigger than pebbles, we perceive the trees to be much farther away. If this picture didn't include the pebbles, it wouldn't have the same sense of depth. |
|
| Use fog or mist - in the real world, when it's misty or foggy, objects that are farther away are less distinct than objects that are closer. If we see the same effect in a photo, our minds automatically assume the same cause - the foggy part is farther away. |
Having something in the foreground which complements the image, or even is part of it, can make the whole image more appealing.
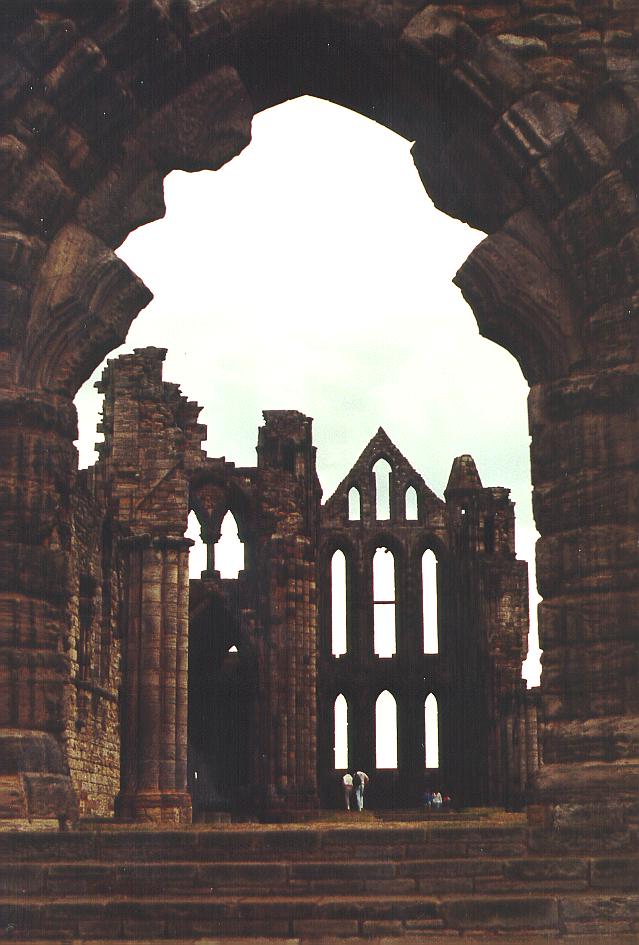
| The stone arch in the foreground is part of the abbey. It helps give the image a sense of scale. |
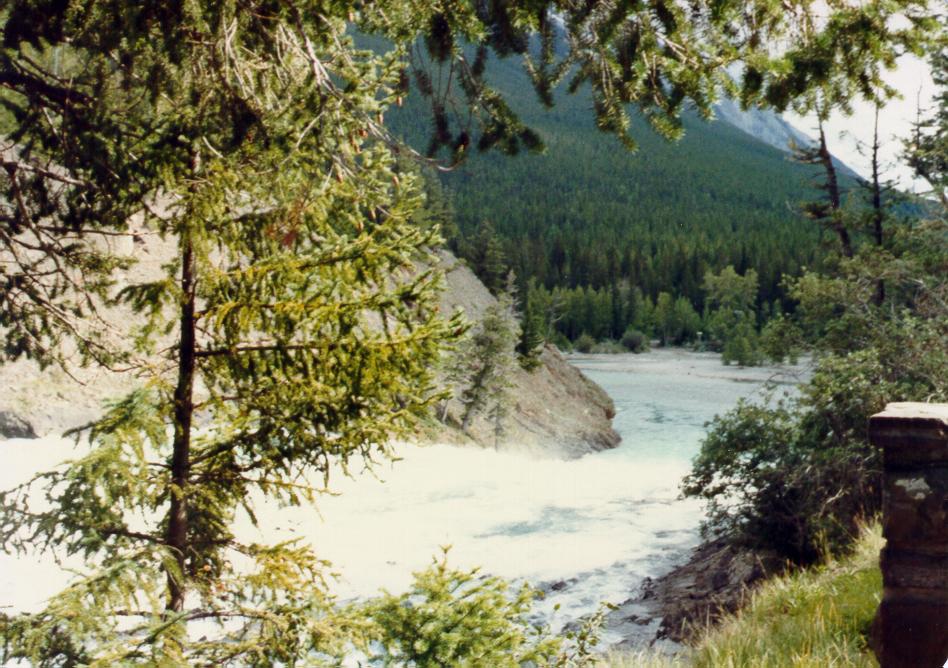
| The trees in the foreground are not part of the scene, but they complement it since much of the background is forested. They also provide a certain sense of depth, since it's easy to compare the size of the trees making the frame to the background trees. |
Try dividing the frame into three sections horizontally, and three sections vertically. Place the subject on one of the lines, or even at one of the intersections. If the subject is looking or moving in one direction, place it so that it's looking or moving in the direction where there is open space.
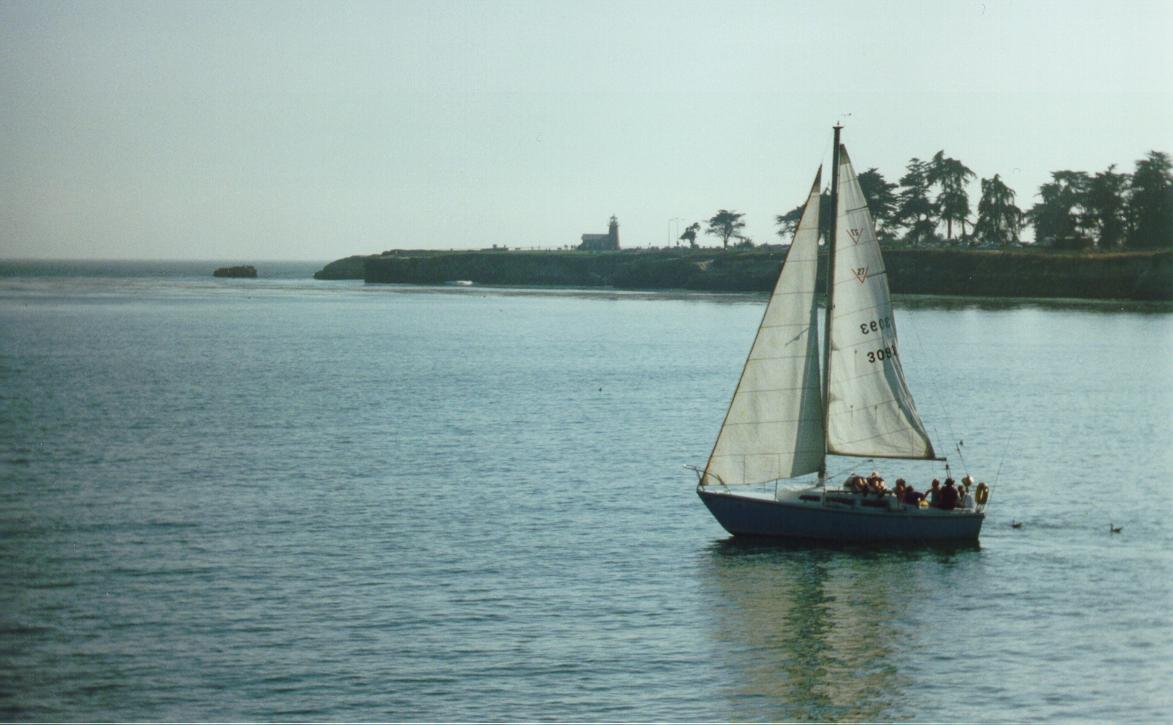
| The sailboat is moving to the left. It's positioned well to the right, to give the impression that it has somewhere to go. |
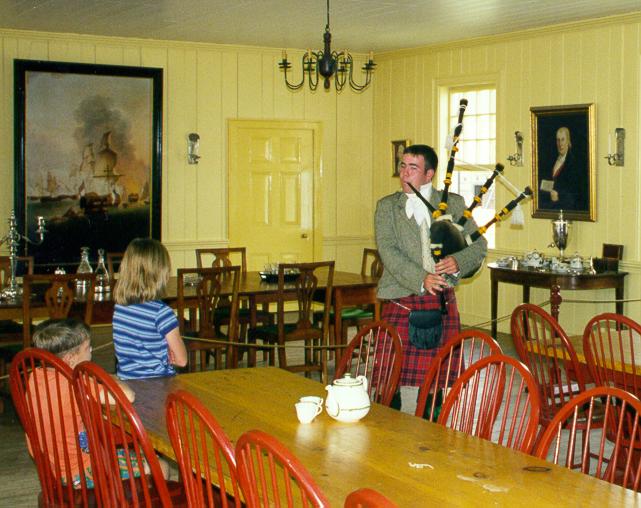
| The man with the bagpipes is facing towards the open space. Also, framing the subject this way leaves room for the children. The picture is much more interesting if there's an audience for the piper, and including the children answers the question "What is this man looking at?" |
|
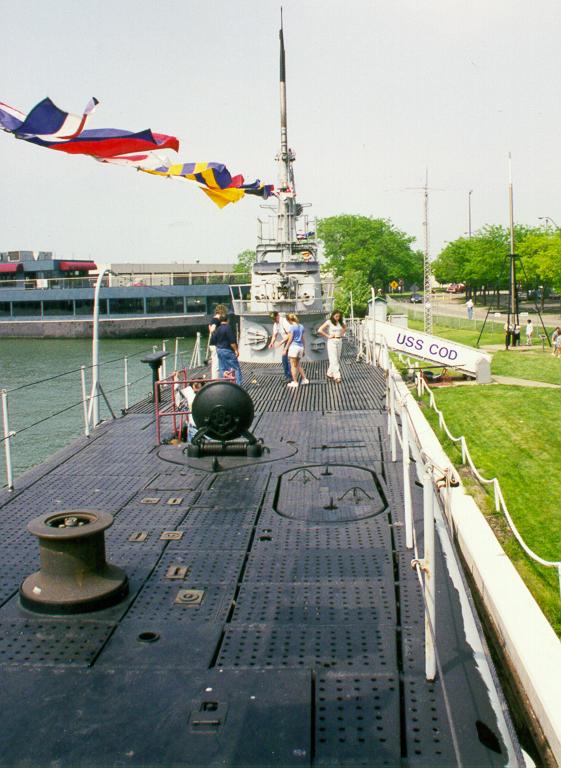
| Show where the canoe is going, not where it's been. |
This is particularly the case when on holiday. If you've gone somewhere popular, everyone will have either been there, or seen pictures from there. Try to find a shot of something that everyone has seen, but from an angle that isn't as common.
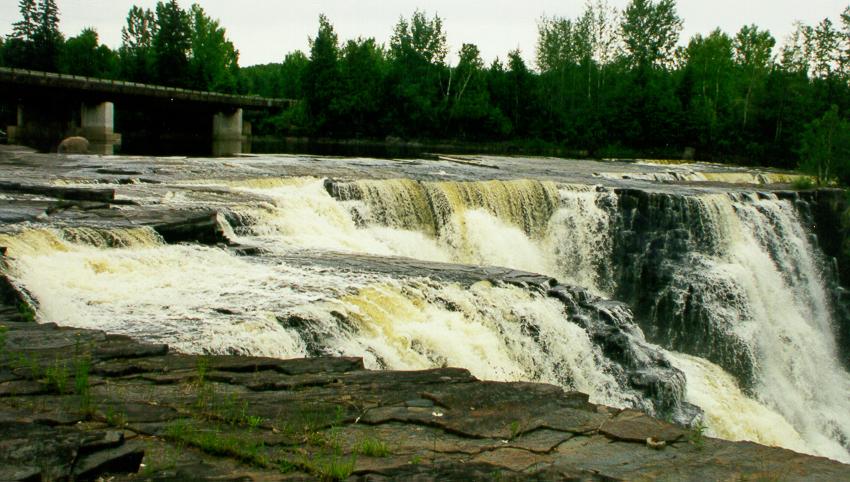
| Most pictures of waterfalls are taken from downstream. Try one looking across the crest instead. |

| Or try using the river downstream of the falls as the focal point, with the falls leading into the river. |
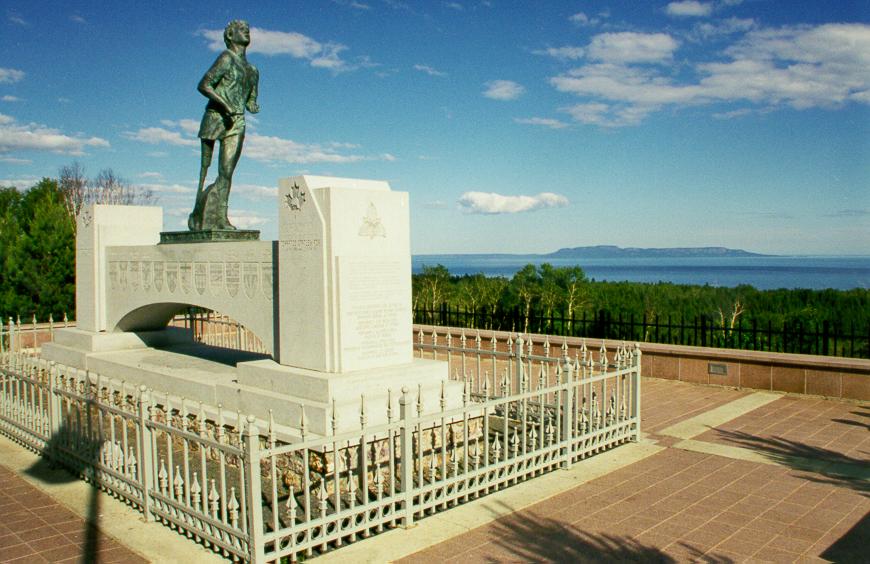
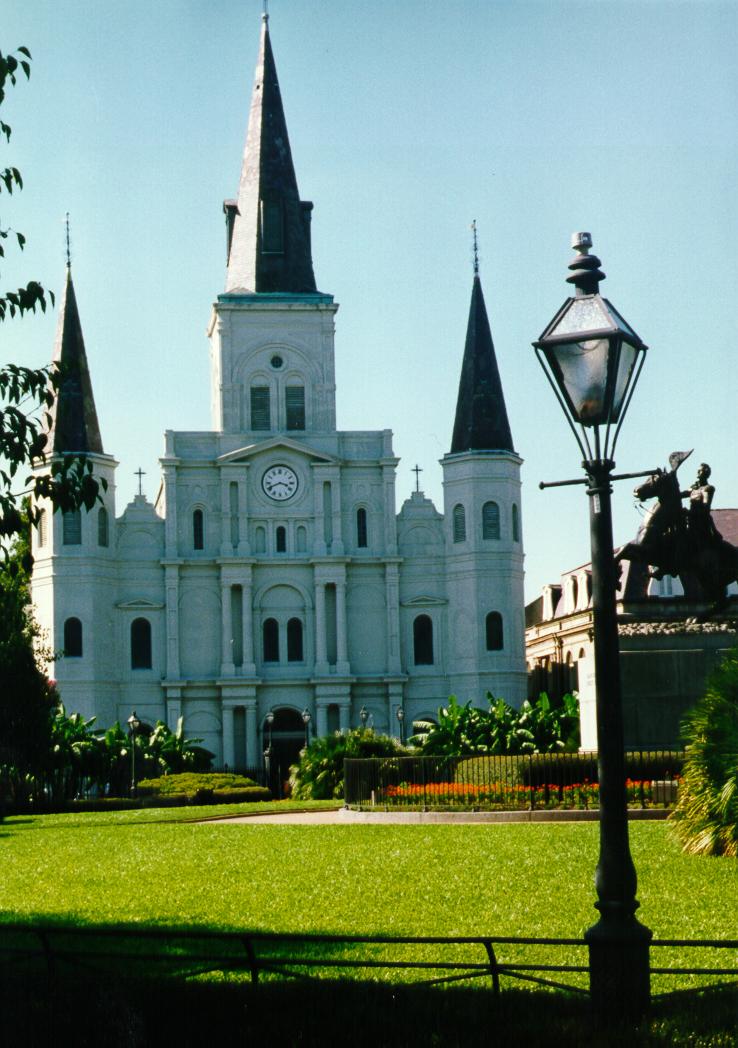
| Everyone takes pictures of momuments and buildings from the ground, looking up. As a result, they converge towards the top and look distorted. Can you get closer to level with your subject? |
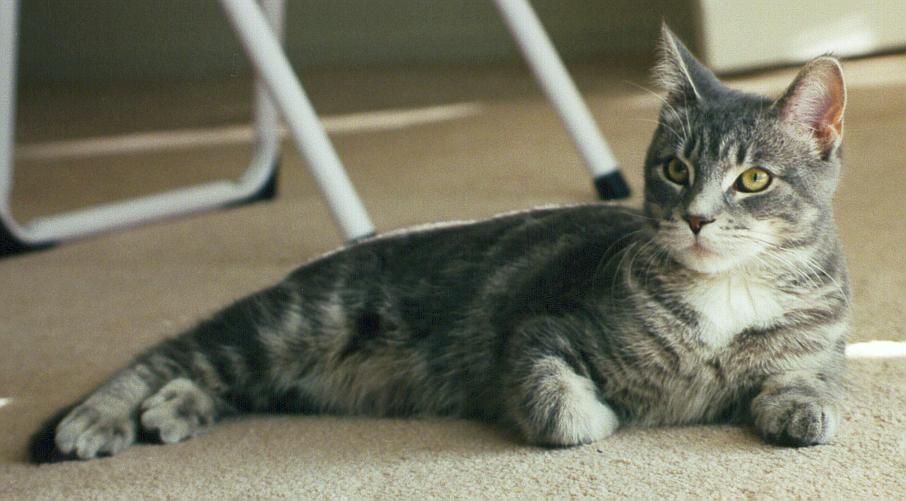
| If you're taking a picture of something low to the ground (for example, a pet or a child), get down to its level. |
If you're taking a picture of something really large, or really small, it doesn't necessarily look really large or really small unless you provide a nearby object of familiar size. People work well, but you can use anything that gives a recognizable scale.

| How big is this Big Nickel? Without the people, you'd have no idea. With people in the corner of the image, though, you can see just how big this coin really is. |
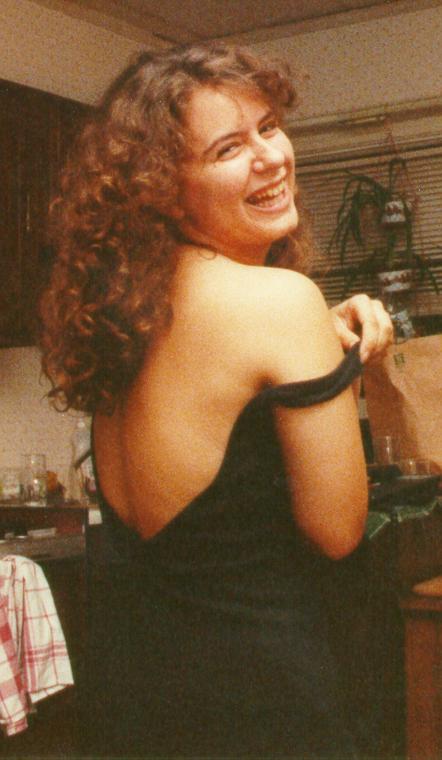
Using light that comes from the side of the subject, rather than above or from the front, can do a few things. It tends to emphasize surface texture by casting shadows. You have to pick your spots for this one; for example, for portraits, you want to be careful about showing the texture of a person's face unless they have really good skin, and be careful with the shadow their nose will cast. But it's good for inanimate objects where the texture is important, and it can also add mood to a picture.
| I like this effect, although I should probably have used a bit of light from the front, or the other side (using the kitchen door as a reflector) to add a bit of light. |