Copyright information
This page is copyright © 2000 Stephen M. Dunn.
Background
In June 2000, Black's
announced
that they were rolling out
Fuji
Frontier digital minilab printing systems to their stores.
I've read many good things about Frontiers in the
photo.net
Q&A forum, including
this
thread, so I was very excited about Frontiers coming to town.
The ads promise significantly better results, and they offered
a free reprint to prove how much better it is. I've taken them
up on it (more than once :-); I chose prints that had identifiable
problems and had them reprinted.
I should state up front that I'm more critical than the average
point-n-shooter. I don't actually expect perfection, but that's the
standard against which I'm measuring the results.
Important notice: I don't yet have any scanned images
for this page; I don't have convenient access to a scanner. I am
planning on adding scans if/when I can. Also, I will be getting reprints
made of additional photos and will update this page with their
results. So check back once in a while.
The Claims (from the ad)
Background Detail
The foreground and background of an image is[sic] adjusted independently
of each other, to compensate for strongly backlit scenes.
Contrast Adjustment
When the sun or an overly intense flash leaves the subject too washed
out, adjustments are made automatically to provide optimum contrast.
Sharpness Adjustment
Improves edge definition of objects, shadows and colours, while
compensating for film grain, to produce crisp, clear photos.
Over or Under Exposure Correction
When overexposed negatives are detected, density and contrast are
automatically adjusted to bring images closer to their proper exposure
level.
Skin Tone Enhancement
This feature searches for peoples[sic] faces in a photo and creates
a more natural appearance, enhancing facial skin tones and compensating
for shadows.
The Tests
Image One: First Dance
A photo of a newly married couple dancing at their wedding reception;
the room was very dark so flash was used for illumination.
- Film: Kodak Ektapress PJ100
- Original Print: Machine print on Kodak Edge paper
- Problems
- Loss of shadow detail: There is no detail in the
groom's tux (detail is present in the negative but the paper
is unable to display it).
- Dark background: The background is visible but quite
dark, due to the use of flash.
- Sunburned face: The groom's face is sunburned, and the
combination of the film and paper emphasizes the red tone
- Evaluation
- Shadow detail: Some detail is visible in the tux.
- Background: The background has been lightened a great
deal and now looks natural (except for harsh shadows from the flash)
and is detailed and colourful.
- Skin tones: Somewhat pale; the sunburn is gone. Skin
tones in the background are reasonable.
- Sharpness and grain: Sharper than the original. Grain
is minimal in both original and reprint.
- Digital artifacts: None.
- Verdict: The original is about what you'd expect from a
photo taken in a dark reception hall - better than nothing, but not a
photo you'd hang on the wall. The reprint is much better. You
still wouldn't hang it on the wall because of the harsh shadows,
but it's unreasonable to expect an automated printing machine to get
rid of those.
Image Two: Fort Edmonton Park
A street scene at Fort Edmonton Park, depicting a street from
the early 1900s. The photo was shot in direct daylight; a polarizer
was used to enhance sky colour.
- Film: Kodak Ektapress PJ100
- Original Print: Machine print on amateur Fuji Crystal Archive
paper
- Problem: The photo looks very nice, but it's very high
contrast. There is some lack of shadow detail in the print, but the
main problem is a white building which appears to be solid white in
the print, but which in the negative is clearly made of white boards
with visible lines between them.
- Evaluation
- Highlight detail: No change; the building is still
a featureless white area.
- Shadow detail: No change.
- Sharpness and grain: Sharper than the original. Grain
is minimal in both original and reprint.
- Colour: Colours are cleaner. White in the original is
very slightly creamy; it's pure white in the reprint. Other
colours also look cleaner.
- Digital artifacts: None.
- Verdict: The original is very nice; just from looking
at it (and not comparing it to the reprint or the neg), it's hard
to find much fault with it. The reprint is better, but not dramatically,
and is still missing much detail that's present in the negative.
Image Three: Family at the Lake
This is a photo of four people at the lakeshore in Toronto on a
bright, sunny day.
- Film: Kodak Portra 400VC
- Original Print: Machine print on Fuji amateur Crystal Archive paper
- Problems: The people are darker than the background due
to being backlit, and there is some shadow detail that's missing.
- Evaluation
- Backlit people: There is a great improvement; faces are
no longer shadowed, and clothing also looks much brighter and more
detailed.
- Shadow detail: No change; there are still areas on the
print that are totalling lacking in detail even though there is
detail present on the negative.
- Skin tones: Skin tones are natural-looking, except for
some unusual grain (see below). Unfortunately, the sharpening
applied by the machine emphasizes wrinkles.
- Background: The background is not as pleasing as in the
original print. The sky has gone from light blue to almost white. The
lake has changed from blue to green (which is more accurate but less
appealing).
- Sharpness and grain: Sharper than the original. Grain
is more prominent in skin tones in the reprint than in the original;
it looks like the combination of lightening and sharpening the skin
tones has emphasized the grain. It's not readily visible as grain to
the naked eye, but rather as a feeling that something looks a bit
odd.
- Digital artifacts: There are a few areas where examination
of the reprint under an 8x loupe shows the jaggies. This is not
visible with the unaided eye, however.
- Verdict: The reprint looks better than the original until
you look closely, at which point you can detect some slight problems
that the digital processing has introduced. I don't know whether
a larger print (apparently, Frontiers can print up to about 8x)
would emphasize these problems; before having multiple enlargements
made, I would have one made first and examine it to see if the
problems are more pronounced.
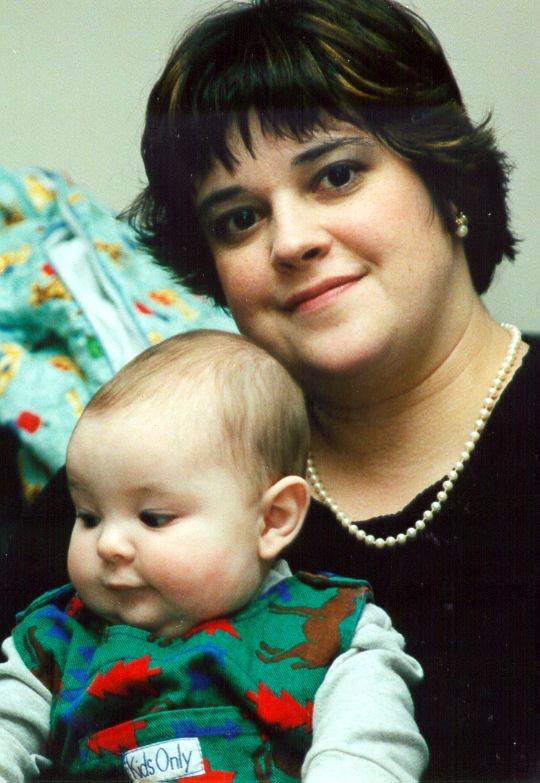
Image Four: Generations
This is a
cropped version of the original. The original also includes more
of the chair on which the mother (my sister-in-law Julie) is sitting.
In the original, Julie appears more out-of-focus than she does in
the scan.
- Film: Kodak Portra 400VC
- Original Print: Machine print on Fuji amateur Crystal Archive paper
- Problems: None, really; this is another test of skin
tones, and a test of whether the Frontier is smart enough to leave
intentionally out-of-focus areas alone.
- Evaluation
- Skin tones: Skin tones are reasonable. They are
redder than on the original, and I think the original is
more pleasing (I'm not sure which is more accurate).
- Background: The background is slightly blurrier than
in the original.
- Sharpness and grain: Sharper than the original. Grain
is about equal.
- Colours: The colours are actually more vivid in the
original. The original is glossy, whereas they did the reprint
on matte, so this may affect the saturation.
- Verdict: They both look good; which one is better is a
question of personal preference.
What about a whole roll?
Having generally liked what I saw, I gave them a whole roll of
Kodak Portra 160VC to print on the Frontier. All of the pictures on
this roll are of people; the roll is split between our company's
summer party (indoors, poorly lit; all shots used flash as the
primary light source) and my nephew Matthew's first birthday
party (outdoors, bright sunlight; many shots used fill flash,
and all were shot with a fairly wide aperture to blur the
background). Since I have not had any of these pictures printed
traditionally, I can't compare them like I've done with the prints
listed above.
I'm generally happy with the results. Skin tones of
several ethnic backgrounds look good in general, though there
are a couple of shots in which people with moderately dark
skin appear flat. The prints are very sharp, and out-of-focus
backgrounds look nice. Many shots show jaggies under an 8x loupe,
but look perfectly normal to the naked eye.
Other Notes
Colours are cleaner in every picture.
While they don't advertise this fact, the Frontier can do more than
print negatives. It also accepts slides (and digital input). I
took a slide that I'd earlier used to check out some of their
other services and had them print it on the Frontier. The print
is beautiful. You can read about it here.
Grain has an unusual look in these prints. Grain normally
looks like it has fairly sharp edges. In all of the Frontier
prints I've had made that show grain, it looks much softer when
viewed under an 8x loupe - almost like it's dithered.
Most images, viewed under a loupe, show jaggies in some areas.
This is not a big issue because few people will view your prints
with an 8x loupe/magnifying glass, and the jaggies are generally
not visible to the unaided eye. However, I plan on getting an 8x10"
print made to find out if the artifacts are a result of scanning
(in which case they'll be twice as bad on an 8x10", and will likely
be visible to the unaided eye in some cases) or printing (in which
case they'll be the same size as on a 4x6" and are not a concern).
Conclusions
It's not perfect, but it's a definite step up from traditional
optical minilabs. If you feed it a perfect negative, you'll probably
get somewhat better results (though a pro lab using more appropriate
paper for a given image might do better). If you feed it a flawed
negative, the improvement it can make (relative to what you'd get from
optical printing) is great. It can't handle the same range of
contrast that a good film can - at least, not on the high-contrast
paper Black's uses. All in all, this is a definite step
forward. I will be using them for most of my printing needs.
 people have visited this page since it was created on 11 July 2000.
Return to assorted thoughts
Return to photo page
Return to home page